Assembly and Installation (For DIY-Solder V2 boards only)
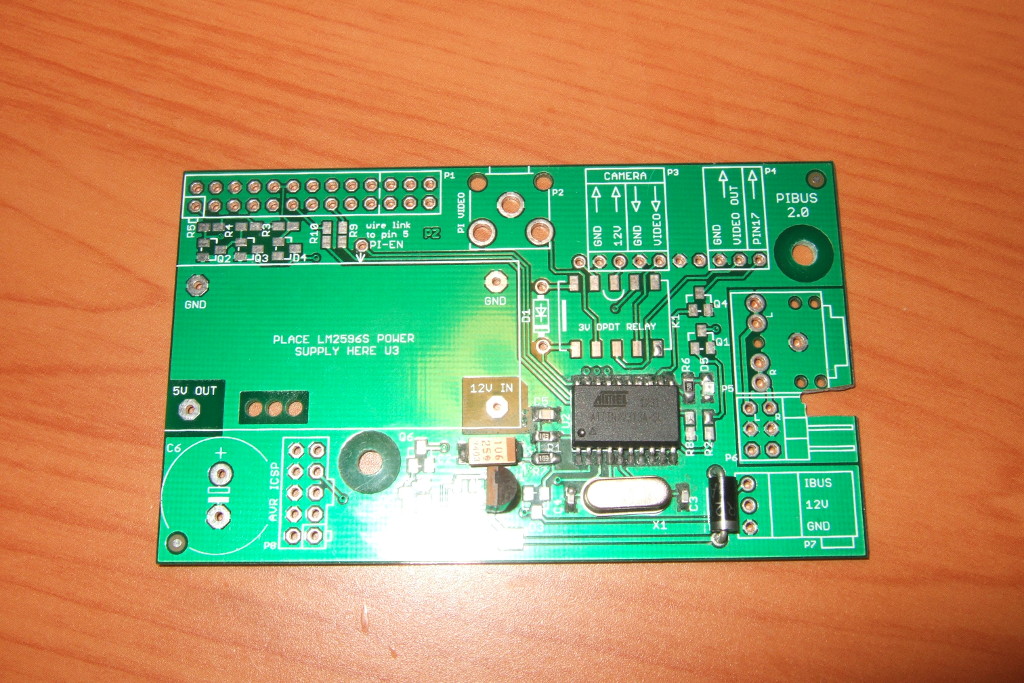
Start by identifying all the parts in the kit. This can be done visually and by the quantity of each part. Currently there are two versions of the board: 2.0/2.1 and 2.2. Both versions are functionally the same, but a few components differ.

Begin by soldering the smaller parts first. The microcontroller (U2) is a good starting point. Use solder FLUX on this part if you have access to some!

It is suggested to then solder these parts:
C2,C3,C4,C5
D2,D5
U1,U2
R1,R6
X1
P7
You can now power the unit (not in a car) with 9-12V to see if the LED blinks. If it does not blink, you need to check your soldering and component placement.
Then proceed to solder the remaining connectors and larger parts. The yellow RCA connector has a tight fit and you may need to trim its legs with side-cutters.

Keep the legs of the audio jack bent or cut so they don't protrude too far. If they are too long they may touch the top of the Pi's USB shell once you screw the two boards together.

Connect the LM2596 power supply board and solder it in place with some left-over diode legs or short lengths of wire.
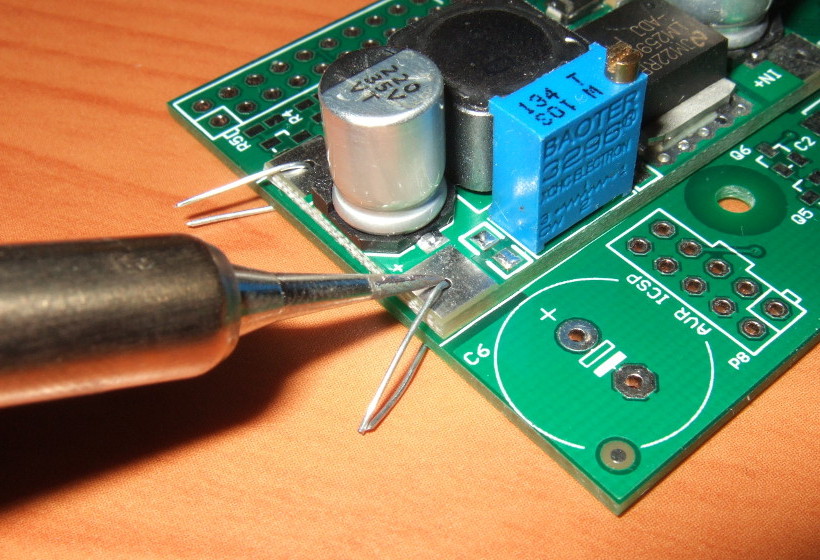
Next you need to lift up one of the LM2596 chip's legs while heating it with an iron. Be gentle and don't force it until it's hot enough!

Then solder it to the PI_EN point on the board. The leg isn't allowed to touch the pad it was originally connected to.

Critical! You need to connect the pibus board to a power supply (9-16V) and adjust the LM2596 to correctly output 5V. These units ship from a factory in China with any old random voltage that could damage your Raspberry Pi. So make sure your Pi isn't connected while doing this adjustment. If you don't have a benchtop power supply, it's possible to connect a 9V battery to the 12V input. Once adjusted, you might like to glue down the adjustment screw.

Next, crimp the three pins onto the supplied cable.
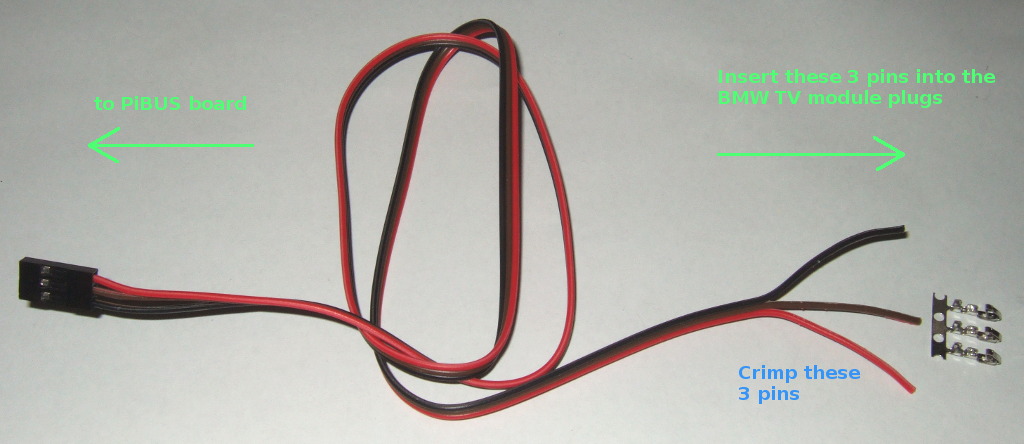
Insert the 3 crimp pins into the white and blue plugs of the BMW TV module. Do not rely on the colours of these three wires, as any random colours may be shipped with your kit.
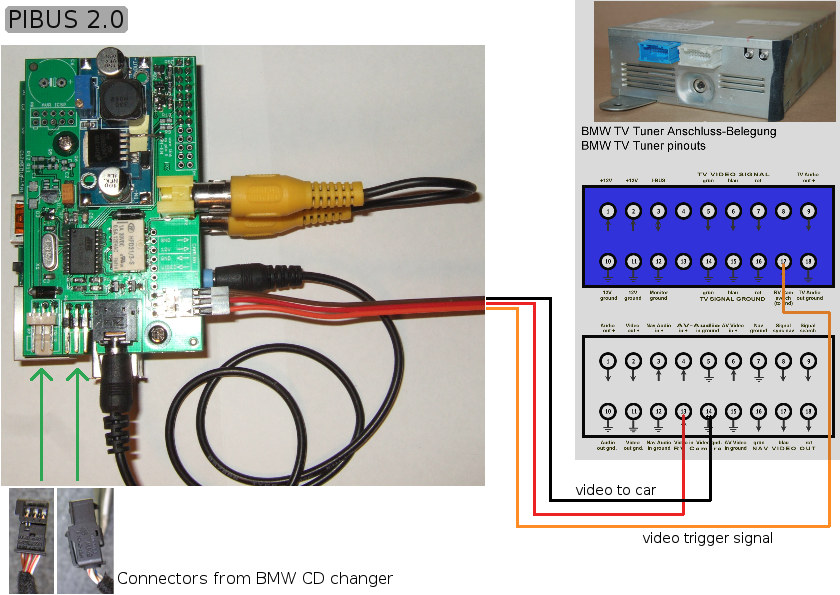

Connect the two CD-changer cables. You will need to remove the plastic shell/cover from the BMW 6-pin cable to allow it to fit.
Done! Now go to the downloads page and install the software.